
Saturday, December 24, 2011
Dad's New Scooter
Yes there is yet another scooter in this man's life. This one I really like. It looks very reto

Sunday, October 16, 2011
Walking Dead Pumpkin


Gotta go watch the show!
TTFN
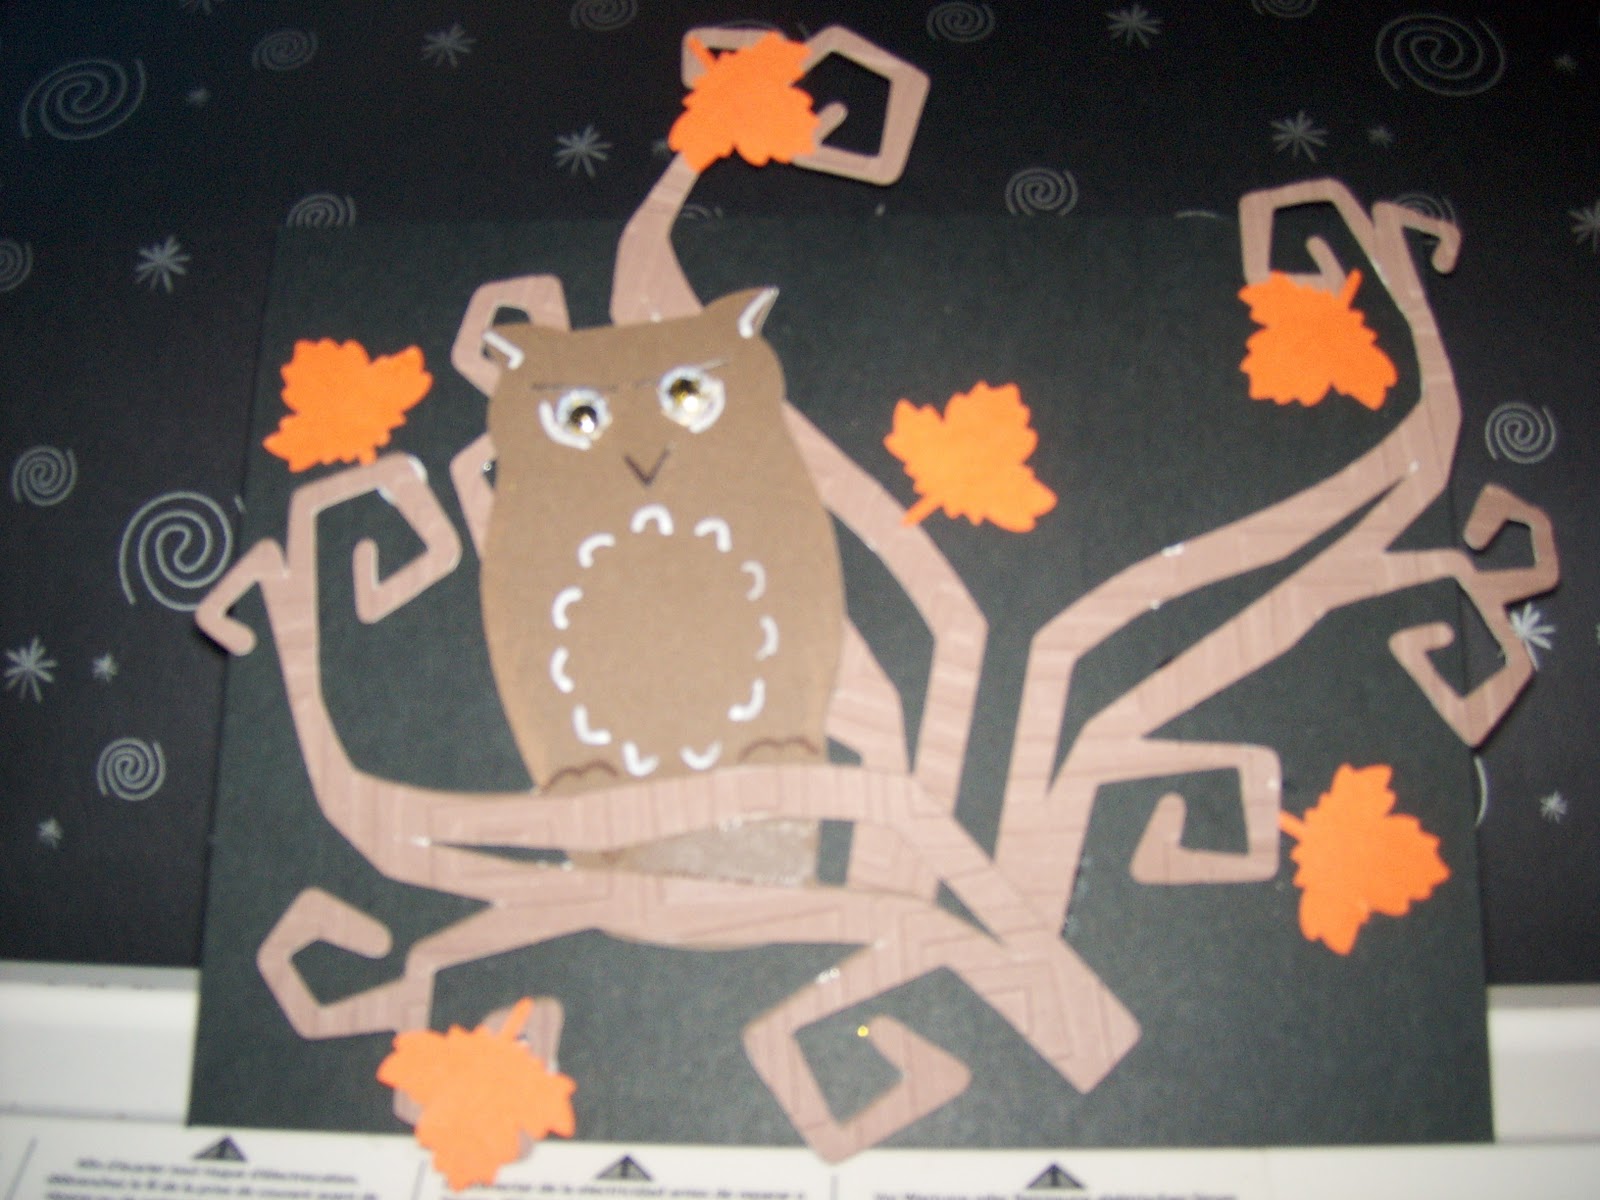
Wednesday, October 12, 2011
Harvest Wich Jar
Have you made yours yet?
Here’s a posting from Silver Ravenwolf that I found on Llewellyn’s website last year taken from her book "HedgeWitch". I did this last year and am doing again this year. Try it it’s a nice project to incorporate into your Samhain activities.

You’ve seen jar magick before—the premise isn’t a new one. Usually such jars focus on a new project or are designed to bring something new to you. This one is a little different. Its theme hinges on a project you already have in motion, and are looking toward a successful and fulfilling harvest. You can choose any subject, from restoring an antique vehicle (that’s been sitting in the garage since the dawn of time) to that quilt you need to finish for your mother’s Yule gift. The jar shown here centers on my newest book, HedgeWitch, which has just been released. Now, I want the material to reach as many people as possible so that they, too, can enjoy the wonderful experience of HedgeWitchery and reap the amazing benefits that I have.
Supplies that I used (you may have a better idea than what I have given, or know a quicker or cheaper way than I do):
Instructions:
Step One: Tear or cut your decorative papers and pictures and affix to jar. Add matching ribbon, charms, etc.—whatever suits your fancy. Perhaps you’d like to dedicate your jar to a particular patron deity – anything goes! From funky to vintage, from car parts to pretty leaves and flowers – there are zero limits to your creativity. On the example jar I used copies of art elements on the book cover, my own artwork, and a few rubber stamp designs, including the magick numbers 3, 7, and 9. I suspended the word “HedgeWitch” with attached dangling beads from copper wire through the holes I made in the lid, then bent the wire for a decorative effect. The words on the copper wire will dangle over the copper pennies (mixed with a few marigolds from my garden) to encourage successful conductivity. As a finishing touch I added velvet ribbon (black – a representation of the stillpoint within the magick circle) and funky, finger yarn.
Step Two: Copy magick charm (listed below) and place either in or on the jar. (To fully understand the meaning of the charm, please see my recent book HedgeWitch.)
Step Three: Hold your hands over the jar and repeat the above charm nine times. Seed with nine new pennies. State clearly what you wish to harvest. Note: See HedgeWitch for a complete explanation of making wishes and clearly verbalizing your intent. Every day for as long as you keep the jar as a decorative object, drop a penny in the jar to continue activating your good thoughts and wishes for that special harvest. Link the sound of the dropping penny to the idea that good things and successful closure are quickly coming toward you. Finish your wish/statement of intent with: “Always a Blessing. It always works!” Once the season is over,
Magickal Theme Ideas (if you don’t have a particular harvest in mind):
Additional Ideas (Variations on the Theme): You can even use your harvest jar at work, placed on your desk. If negativity roams the office and you’re wishing for a better environment, add dried African Basil, lavender, and rosemary from your garden to make a wish/potpourri jar. African Basil or Purple Ruffle Basil makes a stunning and fragrant, artistic statement as well as magickally providing harmony (called sympathy) in any environment. Use rosemary for her powerful cleansing properties, and lavender not only for the aroma and the beautiful color, but also for her soothing capabilities. For quick, offset color, throw in some dried marigolds – success, success, success! At home? Everyone in the family can make a harvest wish jar. Line the finished jars up on the mantle when completed, or use as a centerpiece laced with silk flowers or other decorations to match the season. For a larger centerpiece (say, for a harvest ritual), use a bigger jar that will captivate the guests and allow them to add their own harvest wish with the prerequisite nine pennies. Ring the collective wish jar with tea candles or tapers. As the dining room table collects the chi (energy) of the entire household, placement there would be an excellent choice.
Average Cost of This Project (prices will vary due to your location and size of jar):
Total Time of Project: 30 minutes (this does not include design time – if you are like me, and putz, it will take you longer.)
If you enjoyed making this project, why not do one for Yule? The wish jar makes a great gift idea, too! Empowered jars can be filled with potpourri, buttons, keys…your creativity is the limit! And what’s best? It’s a gift from the Chi.
Notes:
I listed the Xron machine in the Harvest Jar instructions because once you have one, you won’t know how you lived without it. There are several sizes and for the project in this article you’ll only really need the 2.5 model, or to make things easier, the 1.5 and 2.5 models. The Xron machine takes any paper product and affixes a strong glue to the back that you can paste just about anywhere without a lot of muss and fuss or electricity! Just slap the picture in the machine, turn the handle, tear off the paper, pull off the back and you are ready to paste virtually anywhere. Glue types come in permanent and removable (so you can stick one on your absent minded husband’s shoe if you have to).
Here’s a posting from Silver Ravenwolf that I found on Llewellyn’s website last year taken from her book "HedgeWitch". I did this last year and am doing again this year. Try it it’s a nice project to incorporate into your Samhain activities.
From mid-August through October, seasonal energies naturally demand completion and closure. This tying up loose ends, finishing summer projects, and preparing for the cold weather can keep us busy; so busy that we may feel rushed, harried, and worst of all, unable to dedicate large blocks of time to magickally fun projects that would normally ease our stress and keep the harmony flowing. With your busy lifestyle in mind, I’ve developed two easy, arty projects sure to please the entire family and wow your magickal visitors!

Harvest Wish Jar
You’ve seen jar magick before—the premise isn’t a new one. Usually such jars focus on a new project or are designed to bring something new to you. This one is a little different. Its theme hinges on a project you already have in motion, and are looking toward a successful and fulfilling harvest. You can choose any subject, from restoring an antique vehicle (that’s been sitting in the garage since the dawn of time) to that quilt you need to finish for your mother’s Yule gift. The jar shown here centers on my newest book, HedgeWitch, which has just been released. Now, I want the material to reach as many people as possible so that they, too, can enjoy the wonderful experience of HedgeWitchery and reap the amazing benefits that I have.
Supplies that I used (you may have a better idea than what I have given, or know a quicker or cheaper way than I do):
- One Sterilized Canning Jar (I sterilized the jar to begin with a cleansed vehicle for my magick)
- Decorative Papers and Pictures
- Ribbon (I used adhesive-backed black velvet)
- Scissors
- Rubber Stamps & Black Ink
- Clear Embossing Powder
- Xron Machine (or your choice of glue)
- Colored Cardstock
- Hammer and Nail (to puncture two holes in lid)
- Eyelets (for holes in lid) and eyelet setter (makes the top of the jar look more professional)
- Decorative Wire, Wire Cutters, and Jewelry Pliers
- Pre-Strung Glass Beads
- Decorative Finger Yarn
- Markers
Instructions:
Step One: Tear or cut your decorative papers and pictures and affix to jar. Add matching ribbon, charms, etc.—whatever suits your fancy. Perhaps you’d like to dedicate your jar to a particular patron deity – anything goes! From funky to vintage, from car parts to pretty leaves and flowers – there are zero limits to your creativity. On the example jar I used copies of art elements on the book cover, my own artwork, and a few rubber stamp designs, including the magick numbers 3, 7, and 9. I suspended the word “HedgeWitch” with attached dangling beads from copper wire through the holes I made in the lid, then bent the wire for a decorative effect. The words on the copper wire will dangle over the copper pennies (mixed with a few marigolds from my garden) to encourage successful conductivity. As a finishing touch I added velvet ribbon (black – a representation of the stillpoint within the magick circle) and funky, finger yarn.
Step Two: Copy magick charm (listed below) and place either in or on the jar. (To fully understand the meaning of the charm, please see my recent book HedgeWitch.)
Peace With the Gods
Peace With Nature
Peace Within
I love the harvest encased herein.
Thank you
Always a Blessing
It Always Works.
Peace With Nature
Peace Within
I love the harvest encased herein.
Thank you
Always a Blessing
It Always Works.
Step Three: Hold your hands over the jar and repeat the above charm nine times. Seed with nine new pennies. State clearly what you wish to harvest. Note: See HedgeWitch for a complete explanation of making wishes and clearly verbalizing your intent. Every day for as long as you keep the jar as a decorative object, drop a penny in the jar to continue activating your good thoughts and wishes for that special harvest. Link the sound of the dropping penny to the idea that good things and successful closure are quickly coming toward you. Finish your wish/statement of intent with: “Always a Blessing. It always works!” Once the season is over,
Magickal Theme Ideas (if you don’t have a particular harvest in mind):
- Apples and Pumpkins denote money, good fortune, and abundance.
- Grains and Beans are thought to assure food for the following year.
- Scarecrows are protective of hearth and home.
- Ravens and Crows bring messages from Spirit.
- Corn is an offering to the Goddess.
Additional Ideas (Variations on the Theme): You can even use your harvest jar at work, placed on your desk. If negativity roams the office and you’re wishing for a better environment, add dried African Basil, lavender, and rosemary from your garden to make a wish/potpourri jar. African Basil or Purple Ruffle Basil makes a stunning and fragrant, artistic statement as well as magickally providing harmony (called sympathy) in any environment. Use rosemary for her powerful cleansing properties, and lavender not only for the aroma and the beautiful color, but also for her soothing capabilities. For quick, offset color, throw in some dried marigolds – success, success, success! At home? Everyone in the family can make a harvest wish jar. Line the finished jars up on the mantle when completed, or use as a centerpiece laced with silk flowers or other decorations to match the season. For a larger centerpiece (say, for a harvest ritual), use a bigger jar that will captivate the guests and allow them to add their own harvest wish with the prerequisite nine pennies. Ring the collective wish jar with tea candles or tapers. As the dining room table collects the chi (energy) of the entire household, placement there would be an excellent choice.
Average Cost of This Project (prices will vary due to your location and size of jar):
- Canning Jar – prices range from .99 to 1.79 depending on where you shop and the size you buy. Larger jars will naturally cost a bit more. Budget tight? You can find them cheap at flea markets (read my article on magickal haggling in the appendix of HedgeWitch to help you land great deals!).
- Paper, Pictures, Ribbon – If you use what you have around the house and clips from magazines, then there is no cost here. Take your own pictures, use altered art, or purchase wrapping paper or decorative seasonal paper (average cost with ribbon is about $4.00)
- Glue -- $1.00
- Pennies – 9 cents to begin
Total Time of Project: 30 minutes (this does not include design time – if you are like me, and putz, it will take you longer.)
If you enjoyed making this project, why not do one for Yule? The wish jar makes a great gift idea, too! Empowered jars can be filled with potpourri, buttons, keys…your creativity is the limit! And what’s best? It’s a gift from the Chi.
Notes:
I listed the Xron machine in the Harvest Jar instructions because once you have one, you won’t know how you lived without it. There are several sizes and for the project in this article you’ll only really need the 2.5 model, or to make things easier, the 1.5 and 2.5 models. The Xron machine takes any paper product and affixes a strong glue to the back that you can paste just about anywhere without a lot of muss and fuss or electricity! Just slap the picture in the machine, turn the handle, tear off the paper, pull off the back and you are ready to paste virtually anywhere. Glue types come in permanent and removable (so you can stick one on your absent minded husband’s shoe if you have to).
Cool Halloween Poem
"Witches’ hats and harvest moon
Ghosts that dance to haunted tune
Apples, goodies, food galore
Halloween has this and more!"
Ghosts that dance to haunted tune
Apples, goodies, food galore
Halloween has this and more!"
Silver Ravenwolf
Halloween!
Monday, October 10, 2011
Witch Nova
Well it's October 10th and we have been and will continue to be on the look out to see if Madame Witch Nova will be joining us in our Samhain Festival like she did last year.
 I'm sure she'll be back because she left her broom.
On that day we played music and made fall and Samhain recipes and worked on our crafts for the season at hand.
Here's some of the activities we did;
Made a Spirit Candle and placed it inside a carved jack-o’-lantern to help light the way for the spirits.
Made Apple Cider spiced with Cinnamon to honor the dead.
Buried an apple or pomegranate in the garden as an offering for passing spirits.
Make Resolutions, write on paper, and burn in the flame of a black candle.


Decorated with dried corn stalks, pumpkins abd squashes, black birds (my favorite), skeletons, ghosts, colorful leaves and acorns, orange & black candles.
 Made and decorated cookies and cupcakes
More to come ...
T.T.F.N. )O(

On that day we played music and made fall and Samhain recipes and worked on our crafts for the season at hand.
Here's some of the activities we did;
Made a Spirit Candle and placed it inside a carved jack-o’-lantern to help light the way for the spirits.
Made Apple Cider spiced with Cinnamon to honor the dead.
Buried an apple or pomegranate in the garden as an offering for passing spirits.
Make Resolutions, write on paper, and burn in the flame of a black candle.


Decorated with dried corn stalks, pumpkins abd squashes, black birds (my favorite), skeletons, ghosts, colorful leaves and acorns, orange & black candles.

More to come ...
T.T.F.N. )O(
Tuesday, September 27, 2011
New Project - Before & After
Here's a wooden cat statue that I've had for years that I've grown out of so...
 Before

After: My Magical Cat!


Sunday, September 25, 2011
New Toy!

This new toy was purchased when we went out and bought a new litter box for the cat, she keeps hanging her butt out of the box so basically the box is always clean, it's the floor we have to deal with.
Anyway this was very cute and was priced right (it was in the clearance bin).

That's all for now, thanks for looking. We're going back to playing.
Saturday, September 24, 2011
Happy Birthday !

Well today we celebrated my Dad's Birthday! We all got together at my parents house and played Wii (my parents love it!), ate way to much delish food my mom made, sang Happy Birthday and ate cake AND waited for ... Surprise Dad! Here's your b-day present!

My wonderful Mom got my Dad a new Scooter bike thing he wanted (yes that's sunshine yellow), he picked it out and everything so he knew he was going to get it but he didn't know when, my mom told him that because of the payment plan she picked out it was not going to be paid for by his birthday, sorry :(. But she played a trick on him because she had it delivered TODAY!! When she asked him if he really was surprised he said yes, I was actually going to get ready for bed soon. LOL! Oh Dad!

He wanted this new scooter because he said it's more comfortable for them to ride. This whole thing kind of makes me nervous that these to are going to be cruisin' on the open road but they are old enough so I guess I can't say to much, they grow up so fast, sniffle sniffle.


On lookers to the cool new "bike"
Here's a card I made for him on my Cricut Expression. I tried to made the dog look like his dog, I think I did a pretty good job if I do say so myself! Anyway here is a picture of the card & his dog.

Hope you had a great Birthday Dad, Love ♥♥♥♥♥♥ You!
"GET YOUR MOTOR RUNNING
HEAD OUT ON THE HIGHWAY
LOOKING FOR ADVENTURE
AND WHAT EVER COMES OUR WAY
YEAH I GOT TO GO MAKE IT HAPPEN" {Steppenwolf, Born to Be Wild}

Thursday, September 22, 2011
Aren't they adorable?

Check out the how to;
Going to get the supplies together right now, see you later.
Thanks to Elise Blaha
Monday, September 19, 2011
Dog Park


Resting after playing at the dog park. Winning!
TTFN
)O(
Sunday, September 18, 2011
Finally Finished!
Enjoy.

Thursday, September 15, 2011
Glitter!


Sigh ... I ♥♥♥♥♥♥ Glitter
Check out this new glitter I bought, @ Michaels craft store. The brand is Art-C
(http://myartc.com/products-page/art-c-mixed-media/glitter/)
Love the bottles and their packaging is soo cute, so cute in fact I used it in a project.

I cut the packaging and kept the front and then cut silhouettes using my Cricut Expression and the cart. Happy Hauntings. I cut the images at 2", I used the Bride of Frankie and the mummy.


The only thing was that the mummy was all separate pieces, so that was !tedious
I glued the images to ivory crafting paper then glued the ribbon
 then glued the black paper on that to make a nice back to my little picture frames.
The Final product hanging happily on my Halloween Tree!

Tuesday, May 17, 2011
Mother's Day Tea Party - 2011


 The Theme was loosely based on the Alice in Wonderland's Mad Hatter Tea Party.
The butterflies joined us and the Queen's Red roses were present.
Cute Tags made with my Cricut Expression -Plantin Schoolbook cart. for all items like "Drink Me" on the Tea pot and "Eat me" on the Chicken Salad sandwiches and "Blow Me" on the bubble blowing vials.
Welcome sign to greet the the guests.
Pauly's Birthday Cake

Chocolate 2 layer cake with strawberry in between the layers with cream cheese frosting. The cake decor (tombstonstones) were made with my Cricut Expression. Cartridge used Happy Hauntings,Celebrate w/ Flourish. The Font overlay on cake and party hat are made using Picnik
I couldn’t get a picture taken any sooner, you know before we dug in!
Mmm, Enjoy!


Subscribe to:
Posts (Atom)